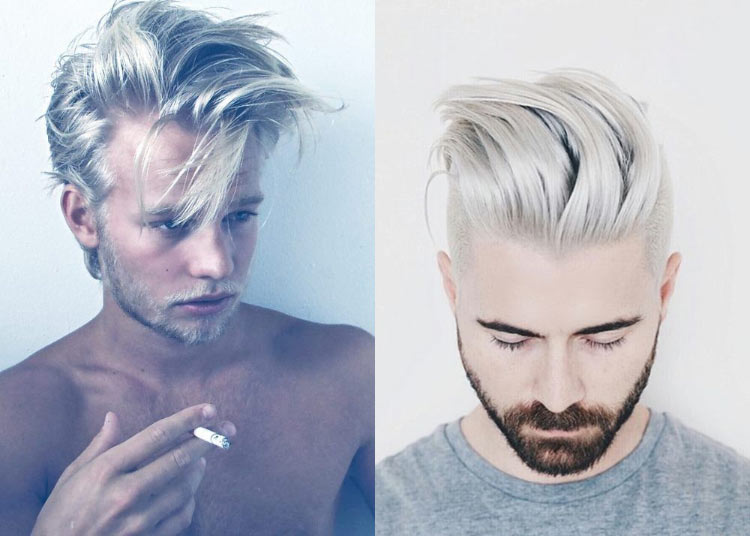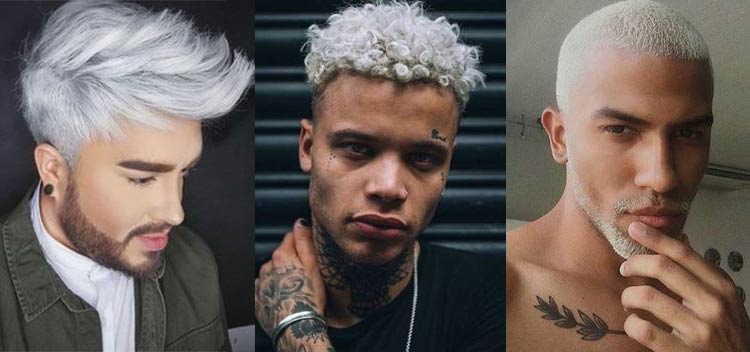
That wave of bleached and platinum hair has left the carnival beats, the electro-funk scene and the soccer fields and hit the streets. And the kids have been investing in the look for some time now.
Well, if you’ve ever thought about it, now is the time. For those of you who are away from the corporate environment or whose dates never leave the virtual world. Now is the time to take your mind off things and change your look.
And like everything, there are pros and cons. It’s that thing, if you don’t like it, ok. You can’t even leave the house, or I don’t know, your hair grows, then you shave it off. If you like the look, you can extend your new locks for the post-quarantine period.
Let’s cause a little trouble and try out the new one. Just go. “Se solta!!!”

Ah, although the process is homemade, we didn’t want to mess it up with you, so we called in two sisters who are hair stylists trained at the best hair academies in Europe and the USA, Yaskara and Indra Niero, both from the Yaskara Corte Y Arte salon, and they’re going to give us the best tips for not shitting on our hair, or rather, for not looking like a pigeon did it.
The sisters promptly told us that chemistry is serious, dangerous and prone to error, so you can’t be too careful. SO WATCH OUT, KIDS, AND DON’T BLAME US LATER.
Before any chemical process, it’s important to know your hair type (dry, mixed or oily) because the process can dry it out even more. Whether your hair is healthy and suitable for any procedure. If your hair has already been colored (because you’ll be able to gauge the extent of the damage) or if it has (because it can obviously damage it). How sensitive your scalp is (because very sensitive scalps can flake). And what shade of blonde you want to achieve (because very dark hair rarely goes platinum the first time).
The sisters also pointed out something crucial. For those who have any kind of straightening, progressive brushing or chemical processes that are cousins of progressive brushing (such as hair botox), it is advisable to do a strand test first, i.e. take a small section of your hair and test it with the product so that you don’t get an unpleasant surprise, which is the famous chemical breakage.
Products used in the home bleaching process:
1. Bleaching powder;
2. Hydrogen peroxide (20 or 30 volumes);
3. Toning;
4. Pot, brush and gloves for mixing and applying the products;
5. Shampoo and moisturizing mask for after-chemicals
First step:
Leave your hair greasy, because the greasier it is, the greater the layer of fat formed to protect your scalp. Let’s increase the oiliness and form this protective barrier by leaving your hair unwashed.
That’s why it’s important to know your hair type. Those with dry hair will have to leave their heads unwashed for two or three days. Those with oily hair, on the other hand, can leave it for less time.
But putzz!!! I washed my hair and wanted to do it today. What do I do? We’ll save you. Use gauze to apply coconut oil to the ends of your hair if you have oily or mixed hair and if it’s dry, you can apply it to the roots, ok?
Step two:
Don’t be slow. Wear old clothes so you don’t risk ruining beloved or new items.
Step Three:
With gloves on, you should use the brush and mix the bleaching powder with hydrogen peroxide in the pot suitable for the procedure (preferably exclusively for this purpose).
How much bleaching powder should I mix with the hydrogen peroxide? That’s the question? Each brand has its own suggested mixture, so read the obverse of your product. This is very important. But generally the ratio is one measure of hydrogen peroxide to two of bleaching powder.
Step four:
Before applying, pay attention to the length of your hair. The application should be from the ends to the roots. If your hair is longer than three fingers, apply only to the ends and wait for the color to reach the desired shade before applying to the roots.
The length of time the product remains on the hair varies greatly depending on hair type, hair health, the natural color of the hair and the desired result, but we can say that the process lasts an average of 40 to 60 minutes.
Lighter, thinner hair will take less time, while thicker, darker hair will take longer. Naturally, in the second option the product finds it harder to work.
Step five:
On the same day, use toner to achieve a different color because toner closes the hair cuticles, i.e. it coats the hair without lightening or changing the existing color.
We can say that toner doesn’t alter the internal structure of the hair in the same way as dye does, unless your hair is already sensitized or post-bleached. In these cases, it is no different from dye, and will do the same as color. It will penetrate the hair in the same way.
Colorist Indra gave us a very important tip. Bro, if you opt for platinum, you must understand that toning will be your great friend. Yes, you should tone your hair every 10 days because otherwise the color can look awful.
The color fades over time and there’s also the matter of the roots, because men’s hair grows at an incredible rate.
Step six:
After finishing the procedure, wash your hair with a good shampoo to remove the rest of the platinum mixture and then moisturize with a moisturizing mask, as the hair tends to dry out.
We also remind you to moisturize your hair with a mask every week.

Would you dare to go platinum? Do you have the desire and the style? Are you prepared to change your look radically?
Tell us about it.


